Showing posts with label vanilla. Show all posts

2017-02-19

Lemon Birthday


Hello all you lovely people,
I hope you are doing well. Today is my birthday, I turn 26, and I am weirdly okay with it.

I had an excellent birthday together with my lovely family. I received great gifts (among them Harry Potter related ones), and we saw Moana (which was so beautiful, and I wish Lin-Manuel Miranda will get the Oscar so badly)!


If you follow me on instagram you will have seen the amazing cake that my family got for me. It was fancy, and gorgeous. It was inspired by the Swedish Princesstårta in flavours, but made to look a bit more haute. It had an almond base and was filled with raspberries and topped off with a vanilla bavarois.

You would think that that cake would be enough, but no. Being who I am, I also needed to bake a birthday cake of my own, and while mine was much simpler, it was still delicious.

I made a lemon and vanilla layered cake with whipped cream frosting and a filling of lemon curd. It was one of the easier cakes I've ever done, so I thought I'd share the recipe with you.


Lemon and Vanilla Birthday Cake


INGREDIENTS
  • 345 grams flour
  • 1 tablespoon baking powder
  • 225 grams butter, at room temperature
  • 300 grams sugar
  • 4 eggs
  • 1 teaspoon vanilla powder
  • 250 ml milk
  • 300 ml whipping cream
  • 300 ml lemon curd
  • Yellow food colouring (optional)

DIRECTIONS

Preheat the oven to 175°C. Prepare two 20 cm round pans with parchment paper at the bottom.
In one bowl, sift the flour and baking powder together. In another bowl beat the butter until a bit fluffier. Then add the sugar and beat for several minutes until light and fluffy. Add the eggs, one at a time, and add the vanilla. Add a third of the sifted flour and baking powder to the egg mixture, then add half of the milk. Continue to add the second third of the flour and finish off by adding the last half of the milk, followed by the last third of the flour.

Spread the batter into the two prepared pans, I like to weigh them so that they become equal in size. And then bake for about 30-35 minutes depending on your oven. A toothpick inserted in the centre should come out clean.
Let the cakes cool completely before you proceed.

Place one of the cakes upside down on your serving plate. Spread 250 ml of lemon curd on the cake. Then place the other cake (also upside down) on top of the spread lemon curd.

Whip the rest of the lemon curd together with the whipping cream until stiff peaks, adding a few drops of food colouring if wanted. Proceed to spread the lemon whipping cream frosting around and on top of the layered cake. Save a bit of the frosting to pipe a border around the cake and add sprinkles if wanted. My sprinkles are from Sweetapolita.


There you have it! Simple as that.
It became a very moist and fresh tasting cake. I liked it, especially considering it was done in a flash.

Have a fantastic week!
Much love,

2016-10-06

Three layers of yum


Hello all,
Wow! I'm still here... I'm so sorry I've been silent for so long and without notice. I was super busy and then I just felt like I needed a little break from the blog. But to hopefully make it up to you, I have a recipe for you today.

This recipe is from The Hummingbird Bakery Cookbook by Tarek Malouf. I was actually lucky enough to be able to go to a Hummingbird Bakery Shop in London. I had a chocolate and caramel cake and it was soooo good *drools*.

Today's recipe is a glorified brownie, with three layers of goodness. The bottom is a regular brownie layer, but it isn't quite like my other brownie, it's a bit cakier and not as dense (although still very rich). The middle layer is a classic cheesecake layer with cream cheese, eggs, sugar and vanilla. And to top it off there's a  layer of raspberry cream!

It really is a delicious combination. I adapted the original recipe quite a bit, with different amounts of several ingredients, and I substituted all the icing sugar in the original recipe to regular caster sugar, because I like caster sugar more. The original recipe is out there on the web, just search for it. I will share the recipe with my adaptions.


Cheesecake brownie with raspberry cream

Adapted from The Hummingbird Bakery Cookbook from Tarek Malouf.

Brownie layer


INGREDIENTS

  • 200 grams dark chocolate, chopped
  • 200 grams butter
  • 200 grams sugar
  • 3 eggs
  • 110 grams flour

DIRECTIONS

Preheat the oven to 175°C. Melt the chocolate in a bowl over hot water. Whisk the butter and sugar thick and fluffy. Add the eggs, one at a time. Add the flour, little by little, until it is all incorporated. Lastly pour the melted chocolate into the batter. Mix well. Pour the batter into a pan that is about 30x20 cm. Even the batter in the pan, and DO NOT bake! Prepare the cheesecake layer.


Cheesecake layer


INGREDIENTS
  • 400 grams cream cheese
  • 150 grams sugar
  • Vanilla powder (to taste)
  • 2 eggs

DIRECTIONS

Whisk the cream cheese, sugar and vanilla until a thick batter. Add the eggs, one at a time. Whisk at a  bit higher speed at the end, but be careful not to over beat it. Pour the cheesecake batter over the unbaked brownie batter. Now bake the brownie/cheesecake for 30-40 minutes. Bake until the cheesecake layer is firm, the edges of the cheesecake layer should be golden, but the middle should be pale. Let the brownie/cheesecake cool and then cover and put in the fridge for at least 2 hours (preferably over night).


Raspberry cream layer


INGREDIENTS
  • 3 dl whipping cream
  • 3 tablespoons vanilla sugar
  • 250 grams raspberry

DIRECTIONS

Mix and sieve the the raspberry to get a smooth purée. Whisk the whipping cream with the vanilla sugar until it is firm then add the raspberry purée and mix well but carefully not to lose the air in the whipped cream.

Spread the raspberry cream over the cheesecake layer, and even it with a spatula. Decorate with more raspberries or sprinkles.


The sprinkles are as always from Sweetapolita's Etsy shop.


Hope you are all doing super well and that autumn is treating you good.
I'll be back soon!
Much love,

2016-08-06

Match made in heaven


Hello all,
Hope you're doing great!

I want to share with you a baking "experiment" if you will. It's not really novel in any way, but for me it was quite exciting because it was the first time I made this dough.

I baked éclairs!

Éclairs are these delicious little pastry made with choux dough, or pâte à choux, which is a dough that you cook. Yeah, you heard me. You cook the dough, and instead of a raising agent, the steam incorporated into the dough helps it poof up!


I've only ever tried éclairs once when I was in London, and bought a chocolate éclair from Ladurée. It was delicious, but I don't feel like it prepared me for the adventure of baking my own.

I decided to take the vanilla route myself, but then added chocolate ganache on top as a glaze. Yummy and a match made in heaven in my opinion - but apparently not something you'd do classically as a pâtissière, I was informed by a French friend. I have started rebelling lately after my quiet and calm adolescent years, so I'll put it down to that.


I've split up the recipe into two parts. One for the actual pastry dough, and one for the vanilla pastry cream that goes into it. For the chocolate ganache that goes on top click here.


Chocolate and Vanilla Éclairs

Recipe adapted from Joy of Baking.

Choux Pastry

INGREDIENTS

  • 65 grams flour
  • 1/2 teaspoon granulated white sugar
  • 55 grams butter, cut into pieces
  • 120 ml water
  • 2 eggs


DIRECTIONS

Preheat your oven to 200°C.
Whisk the flour and sugar together. Bring the water and butter to a boil in a saucepan. Remove from heat and the add in the flour+sugar mix. Return to heat and keep mixing until the dough comes away from the sides of the saucepan and forms a ball. Pour the dough into a mixing bowl and beat for about one minutes to let some of the steam rise away. Once the dough has cooled a little (it's still warm to the touch) add the eggs. Beat until the dough becomes a smooth, thick paste. Pour the dough into a piping bag and pipe oblongs, about 2 cm wide, and however long you want them to be. I made small ones of about 8 cm. Bake for 15 minutes, and then reduce the heat to 180°C and bake for another 25 minutes.


Pastry Cream

INGREDIENTS
  • 300 ml milk
  • One vanilla pod
  • 3 egg yolks
  • 50 grams granulated white sugar
  • 20 grams flour
  • 15 grams cornstarch


DIRECTIONS

Scrape out the seeds in the vanilla pod and add that as well as the actual pod to a saucepan containing the milk. Bring the milk just to a boil.
Mix the sugar and egg yolks together. Mix the flour and cornstarch together and then add the egg mixture to it.
Remove the milk from heat (remove the vanilla pod) and add to the egg mixture whisking constantly. Then pour everything back into a saucepan and cook until boiling, whisking all the while. As it comes to a boil, let it continue for about a minute as the cream thickens up. Pour the cream in a clean bowl and cover the surface with plastic film. Let cool to room temperature and then refrigerate.

Assembly

Before filling the oblongs with pastry cream, dip the prettier side of the oblong in chocolate ganache. Let it dry for a couple of minutes and then you can either cut each oblong into two halves and add pastry cream in the middle. I used a piping bag and filled it with the pastry cream and then stuck the tip into the uncut oblong and pressed the pastry cream into it. It's a bit trickier, but it looks neater. I also added some 23 karat edible gold leaves as decoration to make it even fancier. I got my gold from the Etsy shop Layer Cake Shop (here).


Hope you all have a lovely day!
Much love,


2016-07-17

Ice Cream Day


Hello,
Hope you are all doing great!

Today is National Ice Cream Day in the US, and since most of my readers are in the US I thought I'd celebrate with you by sharing an ice cream recipe.

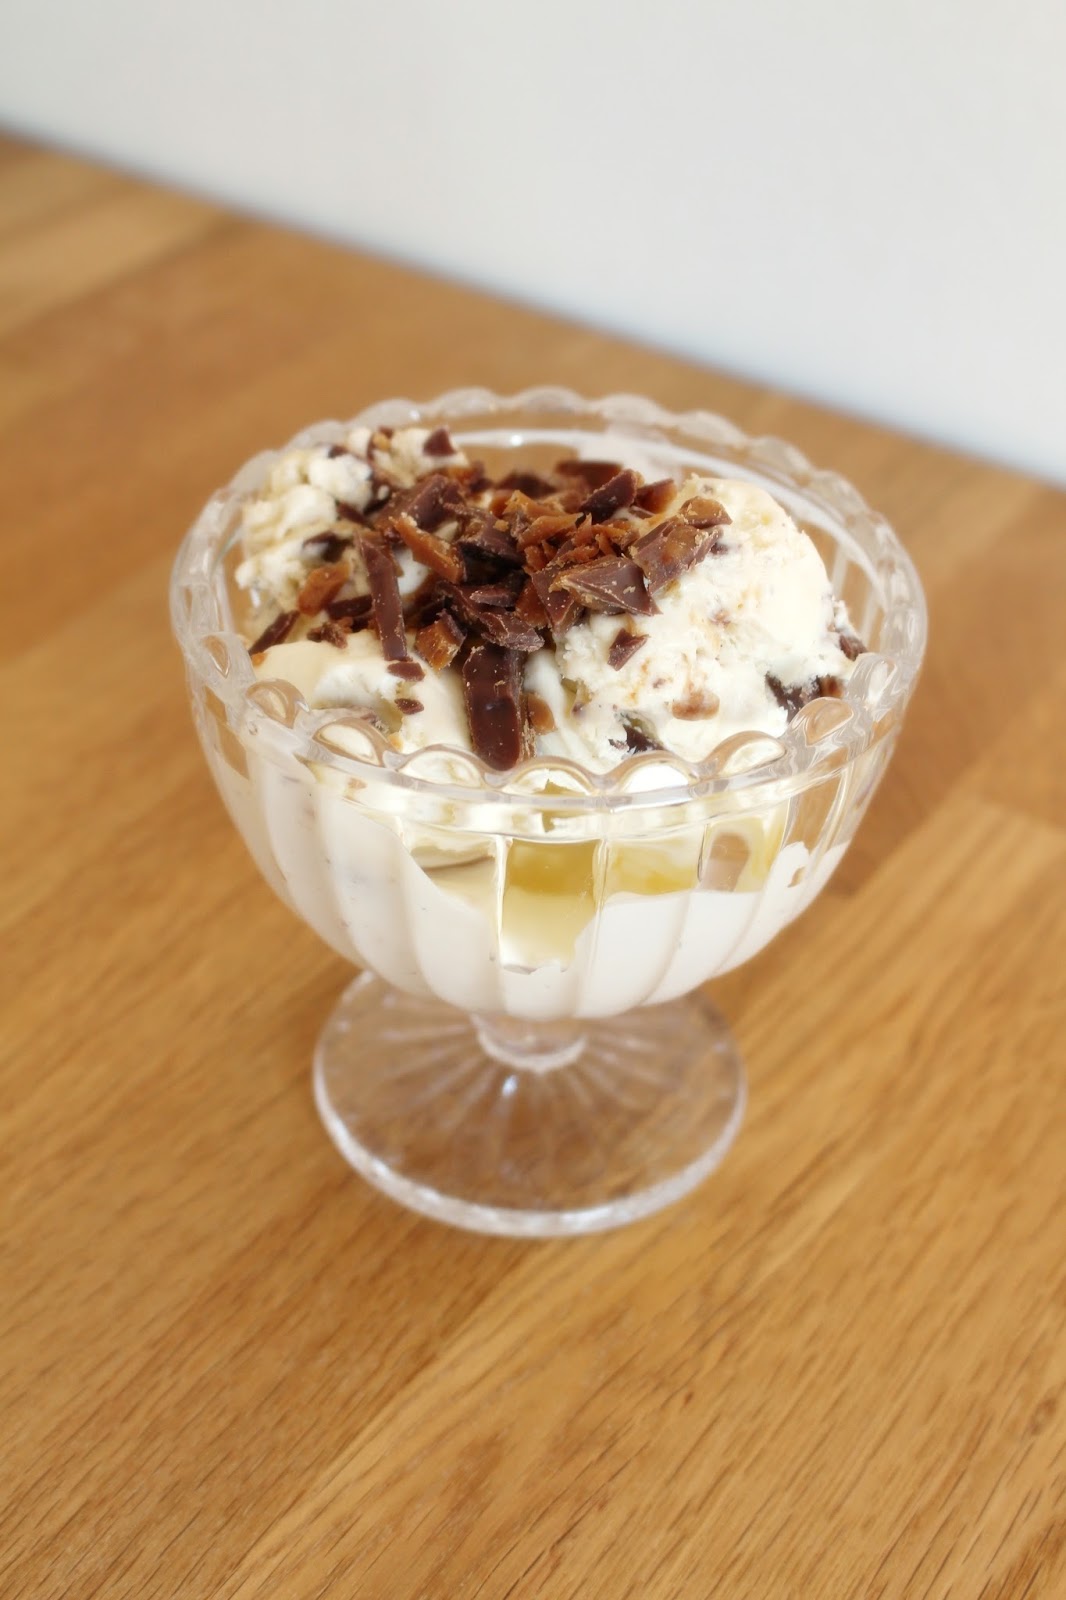
The base of this ice cream recipe is the same as the one in this post. You only need sweetened condensed milk, heavy cream and vanilla. And then you can flavour it which ever way you want. I decided to add chopped bits of my favourite chocolate bar, Daim, in it.


Daim is a crunchy toffee bar covered in chocolate and it is delicious. I have memories of ice cream made with Daim from middle school when we used liquid nitrogen to make ice cream in chemistry class.

The internet told me that the Heath bar and the Skor bar that are available in America are similar to the Daim bar. In other news, Skor in Swedish means shoes.


Easy Daim Ice Cream

Recipe adapted from Manuela Kjeilen.

INGREDIENTS

  • 1 can (397 grams) sweetened condensed milk
  • 4 dl whipping cream
  • 0.5 teaspoons ground vanilla pod
  • 1 double Daim bar (56 grams), chopped

DIRECTIONS

Place the condensed milk and the whipping cream in the freezer for 20 minutes before you start. Take out the condensed milk from the freezer and pour it into a bowl. Whip it with an electric mixer until it is a bit lighter and fluffier. Pour in the whipping cream and continue to beat until it becomes thicker. Add the vanilla and the chopped Daim, and whip some more until it is fluffy and thick. Pour into boxes or bowls and place in freezer chilling it, preferably over night.


Hope you all have a fantastic Ice Cream Day!
Much love,

2016-04-26

Screaming for Ice cream


Hello all you beautiful people!
Hope you are all doing well, and I hope that spring has reached you where ever you are. I wish I could say that spring has reached me here in northern Sweden, but yesterday we had a snow storm, and it seems like spring will never come.

I wanted to write a post about this really easy-to-make ice cream, and I thought that the end of April would be a good time to share the recipe because the weather has warmed up then, but no Sir!

Petulantly I will share this post anyway, cold weather be damned!


So about this ice cream, it is a recipe that I saw on Manuela Kjeilen's (of Passion For Baking) tv show "Baka med Manuela" that aired here in Sweden. It's really easy, and doesn't require an ice cream making machine (which I don't have), so you can just about do it without any tools (although an electric mixer is good to have).


Easy Vanilla Ice Cream

Recipe adapted from Manuela Kjeilen.


INGREDIENTS

  • 1 can (397 grams) sweetened condensed milk
  • 4 dl whipping cream
  • 0.5 teaspoons ground vanilla pod


DIRECTIONS

Place the condensed milk and the whipping cream in the freezer for 20 minutes before you start. Take out the condensed milk from the freezer and pour it into a bowl. Whip it with an electric mixer until it is a bit lighter and fluffier. Pour in the whipping cream and continue to beat until it becomes thicker. Add the vanilla and whip some more until it is fluffy and thick. Pour into boxes or bowls and place in freezer chilling it, preferably over night.


I served my vanilla ice cream with my chocolate brownies, and they were SO good together. To see my brownie recipe click here. I added a bit of colour with sprinkles from Sweetapolita (here).

It really is super simple to vary this recipe and create different flavours. In another post I will show you how you can create other yummy ice cream flavours.


For now though, I wish you the best of days!
Much love,


2016-02-26

Twenty thousand!


Hello you lovely people!
Happy Friday! I am so happy it's Friday, I am going to sleeeeeep this weekend. What are you doing this weekend?


On to some great news (which you might have guessed by the title of this post), this blog reached 20,000 page views yesterday!!

Thank you, thank you, thank you to everyone who reads this blog. Without you this would not have been as much fun, so thank you for reading, commenting and talking to me! You are all golden!


Now I know there's been a lot of cake on the blog recently, but naturally 20,000 page views called for a celebration of some kind. And if you know me you know that celebration means cake.

I made these vanilla cupcakes based on a recipe by Manuela Kjeilen of passionforbaking.com and then topped them with my favourite frosting (that you can find here).


These vanilla cupcakes are super nice and soft, very spongy and moist, and it's probably because of the heavy cream used in them. Usually you would use milk in a recipe like this, but Manuela's brilliant idea of adding heavy cream really paid off.


Another thing I want to quickly mention before sharing the recipe are these cupcake liners. They are from Dr Oetker and the amazing thing about them - They're edible!

Yeah, I kid you not, you can eat the cupcake liners! They're made of rice, corn and potato, and taste almost like nothing (a friend said it tasted like communion bread). And you don't have to peel it off you can just bite straight through your cupcake now! How amazing is that!

If you're in Sweden, you can find more info about them here. I'm sure other countries in Europe also have these cupcake liners by Dr Oetker. Have any of my American readers ever seen these? Or something similar?

I was really very fascinated by them, and they are such a nice pale pink colour. The only difference in baking is that you have to increase the baking time a couple of minutes. And then you have an entirely edible cupcake - liner and all.


Vanilla Cupcake

Recipe adapted from Manuela Kjeilen's baking show Baka med Manuela, episode 2


INGREDIENTS

  • 200 grams butter
  • 325 grams sugar
  • 4 eggs
  • 400 grams flour
  • 1 tablespoon baking powder
  • 5 decilitre heavy cream
  • 2 teaspoons vanilla extract

DIRECTIONS

Preheat the oven to 175°C.
Beat the butter and sugar until light and fluffy. Add the eggs, one at a time.
Sift the flour and the baking powder in a bowl, and then add some of it to the egg mixture, alternating with the heavy cream. Begin and end with the flour. Add the vanilla.
Pour batter into cupcake liners placed in a cupcake tray.
Bake for about 20-25 minutes, a skewer inserted into the cupcake should come out clean.
Let cool completely before piping on the frosting and adding sprinkles.

For my favourite chocolate frosting, click here.


Hope you all have a lovely weekend!

Much love,