Showing posts with label recipes. Show all posts

2019-09-01

Triple Chocolate Truffle Pie


Hello everyone,
Today I am here with a new recipe. Those of you that follow me on Instagram (@curlsncakes) might know that I recently came back from a (more than) week-long holiday in London. It was fantastic and I managed to see plenty of shows, ballets and musicals, one of which were the Broadway hit: Waitress. The musical is based on a movie from 2007 with Keri Russell and Nathan Fillion, with music written by Sara Bareilles. I saw the movie some time ago and loved it, because it was tragic and beautiful, and had so many pies in it.

Waitress is about an unhappy woman, Jenna. She's in a messed up relationship, but works as a waitress in a diner. Jenna's only happy when baking her pies. All along watching the movie and then the musical (which is beautiful with lovely music, by the way) I kept wishing there would be a recipe book for all these incredible pies that Jenna bakes.


Coming out of the play I noticed a book in the little shop stand in the theatre. And lo and behold, it was what I had wished for: Sugar, Butter, Flour - The Waitress Pie Book.
I was so excited and instantly bought it (and some other things).

This first pie that I baked from the book is called the In the Dark Dark pie, and it makes 24 cm pie. I made some modifications to the recipe to suit me and my ingredients more, and I will present that modified recipe. For the original recipe, see the book. Without further ado...


Triple Chocolate Truffle Pie


INGREDIENTS

For the pie shell:
  • 1 packet of Oreos (original)
  • 75 grams melted butter
For the pie filling:
  • 230 grams dark chocolate, chopped
  • 2 dl skimmed milk (1.5% fat)
  • 2 dl heavy cream (35% fat)
  • 2 eggs
For the pie topping:
  • 2 dl heavy cream, chilled
  • 1 teaspoon pure vanilla extract
  • 1/2 dl powdered sugar
  • 3 tablespoons cocoa powder
  • Decorations in the form of chocolate curls

DIRECTIONS

Preheat your oven to 175°C.
Crush the oreos in a blender and add the butter to it. Press the moistened oreo crumbs into your pie tin. Refrigerate for at least 15 minutes and then bake in the middle rack of your oven for 10 minutes.

Bring the milk and heavy cream to just before a boil in a saucepan and pour it over the copped chocolate. Mix until smooth. In another bowl, whisk the eggs and then pour the chocolate mix into the eggs. Pour the egg mixture into the cooled pie crust. Bake for about 45 minutes. The centre of the pie should still be rather loose and wobbly when given a shake.

For the topping mix vanilla, sugar and cocoa together in a bowl. In another bowl whip the heavy cream until slightly thickened, then add the dry ingredients and whip until stiff peaks form. Pipe the topping using a piping bag and a tip unto the cooled (to room temperature) pie. Add the chocolate curls on top, and voilà!


I personally preferred this pie chilled, rather than cooled to just room temperature. So if you're anything like me, bake this pie the day before serving and refrigerate until you are going to eat it.

Until next time!

Much love,
Mona

2019-06-02

Chocolate Macarons


Hello all,
Some weeks ago I made chocolate macarons, after not having baked macarons for over two years. I was worried that I had lost my touch, but alas it was fine!

That proves that this recipe is an easy one, and that really, you have to be really unlucky to fail with it. The macarons may not have been perfect (I think I would've needed another minute of beating the batter), but they were very tasty. That's really all anyone can ask for!


Chocolate macarons

INGREDIENTS
  • 100 g almond powder
  • 3 egg whites (about 100-110 g)
  • 4 tablespoons sugar
  • 185 g powdered sugar
  • 15 g cocoa powder
DIRECTIONS

I like to prepare my egg whites by leaving them in room temperature for a day before I start baking. It yields better macarons in my opinion.
 
Preheat the oven to 150°C.
Sift the almond powder and throw away the large pieces.
Mix the almond powder with the powdered sugar and the cocoa and sift again.

In another bowl whisk the room tempered egg whites until it starts to foam. Then gradually add the tablespoons of sugar. Whisk the egg whites until thick and shiny. You should be able to hold the bowl upside down without anything pouring out.

Add the almond-powdered sugar-cocoa mix to the eggs and mix. This is where it can get a bit tricky. Obviously the almond-mix should get completely incorporated within the egg whites, however you usually need to mix it a bit more. I usually pick up a bit of the batter with a spatula and if it falls down in a ribbon like shape it is ready and should not be mixed anymore. Mix it too much and you get flat macarons.

Pour the batter into a piping bag with a round tip and pipe the batter onto baking trays prepared with baking sheets. Now it is important to let the piped to-be macarons rest on the baking trays in room temperature for about an hour. I know you're eager to see how they turn out, but the resting of the macarons is super important, because the surface dries a bit and that makes them not loose their shape when they are baked, and it enables the feet to come out when baked (if the anatomy of a macaron is a mystery to you, I highly recommend googling it, but below a photo follows to explain some things).


After the macarons have rested for about an hour in room temperature, bake them at 150°C for about 14 minutes.

Let the macaron shells cool completely before you fill them with ganache. For my ganache recipe click here.

I also painted my macaron shells with a bit of edible gold, just so that they would look a wee bit more luxurious.


And that, my friends, is really all there is to it!
I hope you enjoy this recipe.

Much love,
Mona

2019-03-13

3.14 Day


Hello everyone and Happy Pi Day!
I come to you on this special day with another recipe, this time (of course) for pie!

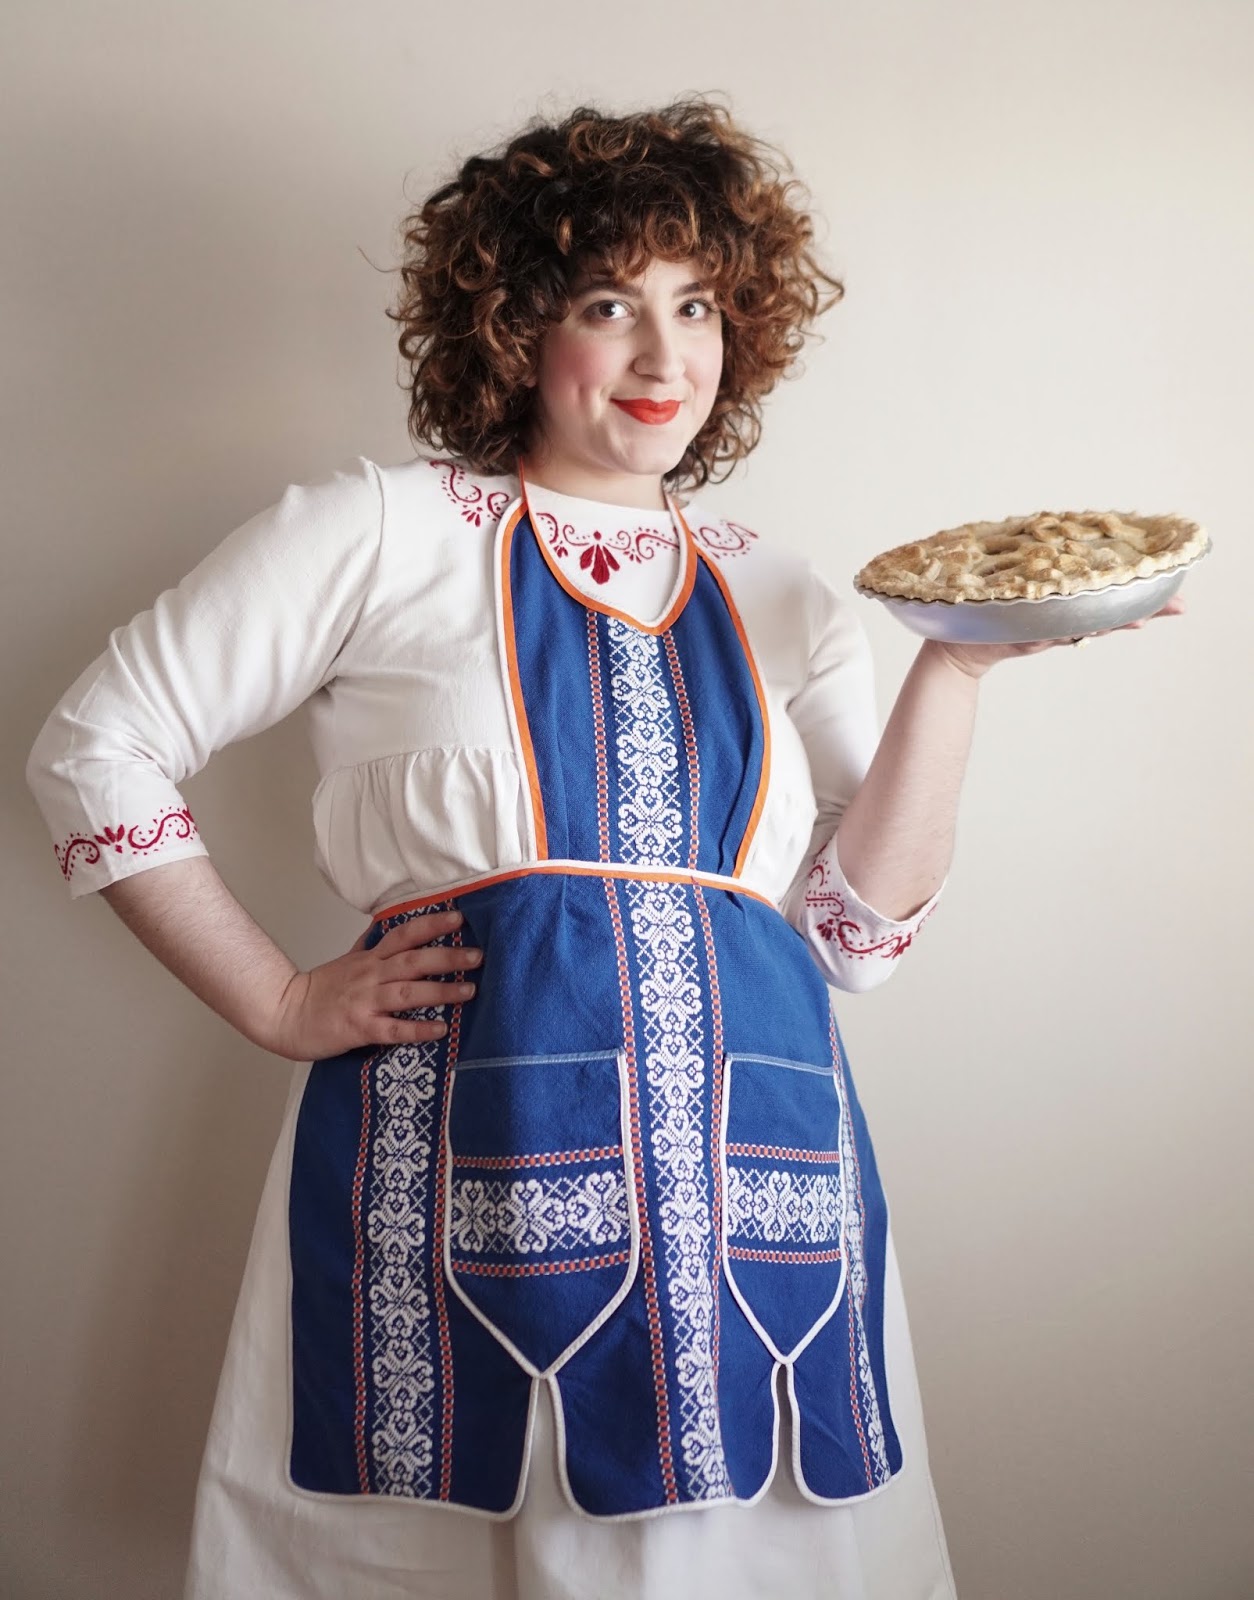
This apple pie is adapted from a recipe by the Hummingbird bakery. I personally love my apples to be a bit on the sour side, so I chose Granny Smith apples, but you could use any juicy apples.

The wonderful apron and dress that I am wearing are both from Olga Valeska's Etsy shop. And my ring is from Femme De Bloom.


Without further ado...


Apple Pie


INGREDIENTS

  • 520 g flour
  • 220 g butter
  • 4-5 tablespoons cold water
  • 150 g butter
  • 5 teaspoons ground cinnamon
  • 1 1/2 kg apples
  • 100 g sugar
  • 1 egg + a tablespoon milk

DIRECTIONS

Preheat the oven to 175°C.
Whisk the 220g butter with the flour, until you get a grainy consistency. Add cold water, tablespoon by tablespoon until the dough comes together. Leave to rest in clingfilm for an hour.

Divide the dough into two equal parts (one part for base, and one for the pie lid). Roll out one part of the dough until half a centimeter thick and line the pie tin with it.

Peel and slice the apples in fairly thick slices.
Put the 150g butter and cinnamon in a saucepan and melt the butter, then add the sugar followed by the apples slices. Make sure all the apple slices are covered with the butter-cinnamon-sugar mixture and let cook for a couple of minutes until the apple slices soften a bit, but are not completely cooked. Spread the apple slices on a plate and leave to cool.

Fill the dough covered pie tin with the cool apple slices. Roll out the other part of the dough, and place it on top of the apple slices like a lid. Cut a couple of slits in the pie lid (so that the steam can leave) and add any decorations.

Beat the egg and add a tablespoon of milk to it, then brush this mixture over the pie lid. Sprinkle on some sugar and bake for 30-40 minutes.


So there you have it, my apple pie. I hope you like the recipe and I hope you spend this Pi Day eating lots and lots of pie. I like to eat my pie with ice cream or custard, but I prefer Pie à la mode. How do you like to eat your pie? Please tell me in the comments.


Much love,
Mona

2019-03-04

Blueberry bundt cake with lemon icing


Hello all,
Today I have a recipe of a delicious, citrusy blueberry cake for you! But before that I need to tell you about my inspiration behind this bake.

Two weeks ago was my birthday. I turned 28 years old, which I'm very happy about, because finally I left 27 behind me. The number 27 is really difficult to pronounce in Swedish - tjugosju. I'm so relieved I don't have to say I'm tjugosju years old anymore!


For my birthday, my dear friend Christiane (IG: @aliceinthewoodssomewhere) sent me a package filled with wonderful things, among them a beautiful Ravenclaw-styled apron that she had made herself!! I fell in love with everything in my birthday package, but I'm a real sucker for handmade things. I imagine that I can feel the love it was made with. This apron, in true Ravenclaw colours brightened my life with it's bold blue colour. And with that I figured I need to bake something with blueberry in it. So after a little bit of experimenting, I present to you a blueberry bundt cake.


Blueberry bundt cake with lemon icing


INGREDIENTS
  • 200 g butter, room temperature
  • 2 dl sugar
  • 4 eggs
  • 4 dl flour
  • 2 tablespoons baking powder
  • 2 teaspoons lemon zest (I used all the zest I got from 1 lemon)
  • 2 tablespoons lemon juice
  • 1 dl milk, room temperature
  • 250 g blueberries
  • 2 tablespoons lemon juice
  • 3 dl powdered sugar

DIRECTIONS
Preheat your oven to 175°C. Prepare the bundt tin by buttering it, and then add flour to it so that the cake won't stick to the tin.

Beat the butter and sugar until slightly fluffy. Add the eggs, one at a time.
Mix the dry ingredients (flour, baking powder, lemon zest) together in a separate bowl.
Mix the milk and lemon juice in another bowl.
Alternate between adding the dry ingredients, then the wet, to the butter-and-sugar-mix. Start and end with the dry ingredients. Mix in the blueberries lastly. If you use frozen blueberries, like I did, they might become a bit wet, and might sink to the bottom of the batter (this happened to me). To avoid that, roll the blueberries in a bit of flour, and then add them to the batter.
Bake for 40 minutes, or until a toothpick inserted in the cake comes out dry.

For the icing, mix the lemon juice with the powdered sugar until it becomes thick, but pipeable. Drizzle or pipe the icing onto the cake after it's cooled.


I hope you enjoy this recipe. It was a lot of fun to make it and then bake it, and finally eat it!

Much love,
Mona

2017-05-30

Creamy-cheesey-chocolatey


Hello all,
Hope you're doing great.

It is time for a new recipe! Yay!
This is my go-to cheesecake. I baked it for my boyfriends family when they were over to my place for the first time, and it was a success. I've made it many times before, so I knew that it would be good.


This cheesecake is creamy, chocolatey and delicious. One of the things I love about it is that you can decorate it however you want. You can add berries or fruits during the summer season, or sprinkles when berries are scarce.

I added berries, some whipped cream and biscuit crumbs for decoration, and I think it looks rather nice.


Chocolate Cheesecake


INGREDIENTS
  • Digestives, crushed - 200 grams
  • Cocoa powder - 2 tablespoons
  • Butter, melted - 100 grams
  • Cream cheese - 900 grams
  • Sugar - 150 grams
  • Eggs - 4
  • Dark chocolate, melted - 200 grams
  • Vanilla powder - 1-2 teaspoons

DIRECTIONS

Preheat the oven to 150°C.

For the base: Crush the digestives into fine crumbs (I use a food processor) and mix with the cocoa powder. Pour the melted butter over the crumbs and mix until all crumbs are moist. Prepare a 24 cm springform cake tin by greasing the sides and lining the base with parchment paper. Press the moist crumbs into the base of the cake tin, flatten with hand or spoon, and then put into fridge.

For the cheesecake filling: Melt the chocolate (I use a double boiler), and allow to cool a little. Mix the cream cheese, sugar and vanilla with a handmixer until smooth and thick. Add one egg at a time and mix in. Do not over mix! Now spoon a little of the cream cheese mixture into the melted chocolate. This will even out the temperatures. Continue in this way until half of the cream cheese mixture is mixed with the chocolate. Then mix it all in.

Pour the filling onto the base. Place the cake tin in a larger baking tin and fill the outer tin with water. Bake in this waterbath for about 50 minutes. The times varies, and depends on your oven. The cake should be wobbly in the middle. Once you've removed the cake from the oven allow it to cool before placing it in the fridge, preferably overnight.


Hope you all liked this recipe, it really is worth making as it is so delicious. I'm sitting here drooling a bit just as I'm writing everything down.

Have a fantastic day.

Much love,

2017-02-19

Lemon Birthday


Hello all you lovely people,
I hope you are doing well. Today is my birthday, I turn 26, and I am weirdly okay with it.

I had an excellent birthday together with my lovely family. I received great gifts (among them Harry Potter related ones), and we saw Moana (which was so beautiful, and I wish Lin-Manuel Miranda will get the Oscar so badly)!


If you follow me on instagram you will have seen the amazing cake that my family got for me. It was fancy, and gorgeous. It was inspired by the Swedish Princesstårta in flavours, but made to look a bit more haute. It had an almond base and was filled with raspberries and topped off with a vanilla bavarois.

You would think that that cake would be enough, but no. Being who I am, I also needed to bake a birthday cake of my own, and while mine was much simpler, it was still delicious.

I made a lemon and vanilla layered cake with whipped cream frosting and a filling of lemon curd. It was one of the easier cakes I've ever done, so I thought I'd share the recipe with you.


Lemon and Vanilla Birthday Cake


INGREDIENTS
  • 345 grams flour
  • 1 tablespoon baking powder
  • 225 grams butter, at room temperature
  • 300 grams sugar
  • 4 eggs
  • 1 teaspoon vanilla powder
  • 250 ml milk
  • 300 ml whipping cream
  • 300 ml lemon curd
  • Yellow food colouring (optional)

DIRECTIONS

Preheat the oven to 175°C. Prepare two 20 cm round pans with parchment paper at the bottom.
In one bowl, sift the flour and baking powder together. In another bowl beat the butter until a bit fluffier. Then add the sugar and beat for several minutes until light and fluffy. Add the eggs, one at a time, and add the vanilla. Add a third of the sifted flour and baking powder to the egg mixture, then add half of the milk. Continue to add the second third of the flour and finish off by adding the last half of the milk, followed by the last third of the flour.

Spread the batter into the two prepared pans, I like to weigh them so that they become equal in size. And then bake for about 30-35 minutes depending on your oven. A toothpick inserted in the centre should come out clean.
Let the cakes cool completely before you proceed.

Place one of the cakes upside down on your serving plate. Spread 250 ml of lemon curd on the cake. Then place the other cake (also upside down) on top of the spread lemon curd.

Whip the rest of the lemon curd together with the whipping cream until stiff peaks, adding a few drops of food colouring if wanted. Proceed to spread the lemon whipping cream frosting around and on top of the layered cake. Save a bit of the frosting to pipe a border around the cake and add sprinkles if wanted. My sprinkles are from Sweetapolita.


There you have it! Simple as that.
It became a very moist and fresh tasting cake. I liked it, especially considering it was done in a flash.

Have a fantastic week!
Much love,

2017-02-14

Vday cleaning


Hello all you lovely people,
Happy Valentine's Day!!

I hope you all have a fantastic day, filled with love and chocolate (which is basically love, so love and love).

I have personally spent Vday loving myself - which is also important, and should not be forgotten. And then of course loving my family and friends. I also wanted to extend that love to you, by sharing a recipe with you!


These little pink rolls are called Dammsugare in Sweden, which means Vacuum cleaner. Why? I don't know. I've always thought it's because they're shaped like the vacuumy part of a vacuum cleaner. But for now it will remain a mystery.

Anyway, you take crumbs from biscuits or cakes and mix it together with a few other ingredients to get a sort of dough, then you roll out the dough to thin logs which you then wrap into marzipan (usually green, but I made a Valentine's-y pink instead).

The most important ingredient is arrack or punsch, these little things are also called Arrack-rolls or Punsch-rolls. I personally don't use alcohol when baking so instead I used arrack aroma. It does have a distinct taste/scent, but I like it very much. However, fair warning, not everybody likes it.

 
Without further ado, the recipe...

Vacuum cleaners


INGREDIENTS
  • Crumbs from cake or biscuits, I used 8 digestives
  • 2 tablespoons cocoa powder
  • 1 teaspoon vanilla sugar
  • 30 grams almond paste
  • 1 decilitre oatmeal 
  • 2 tablespoons brown sugar
  • 85 grams butter, room temperature
  • 0,5tsk Arrack aroma or actual arrack or punsch
  • 400 grams marizpan
  • Food colouring (optional)
  • 150 grams dark chocolate

DIRECTIONS

Crush the digestives into crumbs, mix together with the cocoa powder, vanilla sugar, almond paste, oatmeal and brown sugar. Then add the butter (at room temperature) and make into a dough. Lastly add the arrack aroma. Form dough into thin logs, about 1.5 fingers thick. And place in fridge.

If colouring marzipan do so now, and then roll out the marzipan to a rectangle. Take the dough logs out of the fridge and place onto the marzipan. Wrap the marzipan around the logs and cut away the excess. Cut the logs into smaller pieces. Melt the chocolate and dip both ends of a roll into the chocolate.


Enjoy!

Much love,


2017-02-05

The Nutella Semla


Hello all you lovely people,

Last year on a day just like this, I claimed that it was no ordinary day. And I'm here to say that is the case this year as well!

It's World Nutella Day!!

*confetti and balloons*

I've also mentioned before how February is a yummy month, because it's got the Nutella day, Valentine's Day (obviously you eat something sweet on Vday) and Fat Tuesday where we eat Semla in Sweden.


This year I decided to combine two yummies in one!
I present to you -- the Nutella Semla!

It is basically a Semla-bun filled with Nutella instead of almond paste and dusted with cocoa powder instead of powdered sugar.

For the Semla-bun check out my recipe from last year here from the post Fat Tuesday.


The Nutella Semla


INGREDIENTS

  • Everything needed for the Semla-buns minus the almondpaste and powdered sugar
  • 1 jar of Nutella
  • Cocoa powder

DIRECTIONS

We'll start from where the buns are out of the oven and cooled.

Cut off the top of each bun. I use scissors and cut out a triangular shape. Leave the lid for later use. Empty the middle of the buns, creating little wells. Spoon in as much Nutella as you can fit inside of the wells.

Whip the whipping cream with vanilla sugar until soft peaks and pipe it onto the filled buns using a star tip (I use Wilton 1M). Add the lid on top of the piped cream, very gently pushing down a little. Dust the lids with cocoa powder.


I hope you all have a fantastic Nutella day!
Please let me know if you make these yummy little pastries!


Much love,

2016-12-21

Saffron wreath


Hello all,
In the week leading up to Christmas I get in an incredibly "bakey" mood. All I want to do is bake, eat and sing christmas songs. I thought I'd share some photos and the how-to of a baked wreath that I made, that was a major success at work and in the family. I'm personally very pleased with it, if I may say so myself.

The dough is the traditional Swedish saffron bun dough, that I shared last Christmas on the blog (here). This saffron wreath is made super luxurious though, by adding not only the gold of the world of spices, but also almond paste, orange zest, raisins, pistachios and cranberries. I garnish the whole thing with chopped pistachios and cranberries giving it a look of true christmas jewels bedazzling the wreath.

Without further ado...


Saffron wreath


INGREDIENTS


  • 5 dl milk
  • 50 grams fresh yeast
  • 1,5 dl sugar
  • 2 grams saffron
  • ~14 dl flour
  • 100+50 grams butter
  • 200 grams almond paste
  • 60 grams pre-shelled raw (unsalted) pistachios
  • 60 grams raisins
  • 40 grams cranberries
  • Zest of 1 orange
  • Cinnamon
  • 1 egg

DIRECTIONS

Melt 100 grams of the butter in a pan together with the milk. Let it reach 37°C. Solve the yeast in the milk and butter mixture, then add the sugar. Solve the saffron in 1 tablespoon warm water, and the add it to the rest. Add the flour, you might not need all of the flour so add it in additions. When the dough isn't super sticky anymore and releases from the bowl it is saturated for flour. Cover and let prove for 1 hour, until the dough is twice as big.

Whilst waiting for the dough you can grate the almond paste, chop the pistachios, raisins and cranberries, and zest the orange. Save a bit of the pistachios and cranberries for garnish.

Divide the dough into two equal balls. Roll out the ball to a rectangle with a rolling pin to about 1 cm thickness. Spread half of the rest of the butter (25 grams) onto the rectangle and then add half of the almond paste, pistachios, raisins, cranberries and zest of the orange on top of the butter. Press the fillings into the dough a bit. Sprinkle cinnamon on top of the rest of the fillings.

Roll the rectangle up on its long side and bring the two ends together, forming a circle. Press the ends to each other so they stick. Then cut slices in the circle with scissors, you're just cutting about halfway through the roll. Do this at an angle and then turn the cut in the opposite direction. I've added photos (and a gif) of these steps as I'm terrible at describing it.


Do this all along the circle creating a beautiful wreath. Put the wreath on parchment paper and cover and let prove for another hour. Before baking give the wreaths an egg wash and garnish with the left over pistachios and cranberries. Bake at 200°C for 15-20 minutes at the lowest part of your oven.


I really think this is the most decadent you can go while steering clear from chocolate. Pistachios, cranberries and the gold - saffron! Oh this is such a heavenly bit of baking!


I just baked this for the second time this year (so my fourth wreath of the year) and I am still head-over-heels for it!


I hope you all enjoy the recipe and if I don't blog again before Christmas I want to take the opportunity and wish all of you a very Happy Christmas!

Take care and spread joy!
Much love,